Watch the trend
Compare your stocks at similar points over several cycles. Are meals and water recovering after use, or stepping lower each time? A single dip when residents eat is normal; a repeated decline needs attention.
 Hearthlings
THE PLAYTEST FIELD GUIDE
Build your first workplace, keep meals and water flowing, and give your Hearthlings room to grow.
For the 0.47.0 playtest · Updated November 18, 2026
Phone placement steps match iOS build 13 / public build 14. Other builds may look different.
01 / A STEADY START
Choose New world and enter your town. Pause while you make a plan. Starting materials are limited: get essentials working before spending on decoration or lots of new homes.
Open Production. Place a Farm or Berry patch on suitable land, then a Kitchen. Farms and berry patches make ingredients; the kitchen turns ingredients into meals. Ingredients alone are not meals.
Open Water and place a Rain collector. A Cistern adds room to store water, but does not create it. Build up a reserve while the weather is favourable.
Select each workplace and check its crew and status. A new staffed building assigns one free worker when available. Some buildings need more: a quarry, for example, needs at least two. Use the worker + and − controls to reassign your existing workforce.
Use Land → Gather area and choose two corners around trees or rocks. Free workers gather the marked resources. For ongoing production, a forester needs trees nearby and a quarry needs nearby stone. Keep some workers free for gathering.
Watch supplies through several meal and drink cycles before expanding. A town that looks comfortable at one moment may still be using resources faster than it makes them.
02 / TOUCH & BUILDING
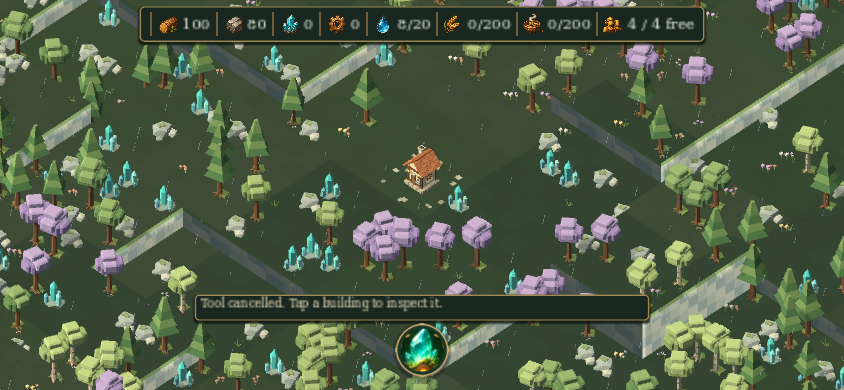
On iPhone, tap the gold crystal button at the bottom centre to open the building categories and tools. Menu is in the expanded view. iPad uses the larger category toolbar.
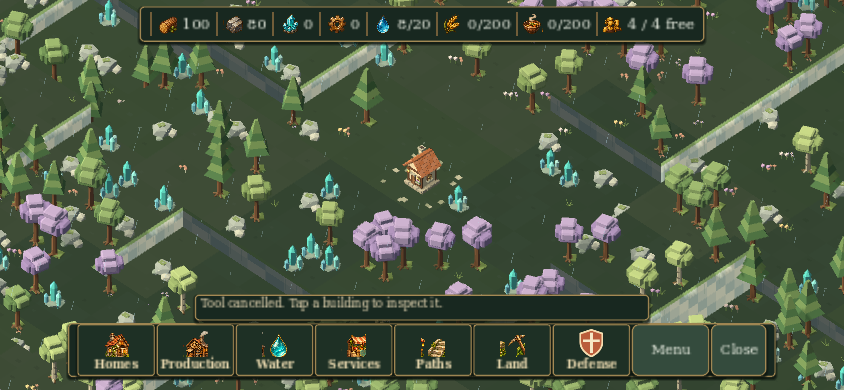
Read its purpose and material cost in the catalog.
One finger moves the building preview while placing. Lift your finger to leave the preview where it is. Lifting alone does not build or spend resources.
Use two fingers to pan or pinch to zoom while positioning a building. When no building tool is active, one-finger dragging pans the map.
Use Rotate if needed. Read any “Cannot place here” message and move to a suitable spot. Tap Place to confirm. Cancel leaves the tool without placing.
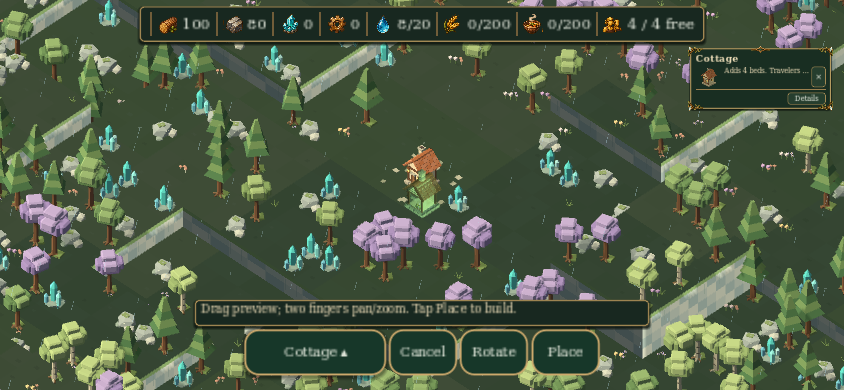
To inspect an existing building, cancel the active tool first, then tap it. Open Details if the compact inspector is showing. Land tools such as gathering and paths have their own selection flow; the Place confirmation above is for buildings.
03 / THE HEART OF A WORKING TOWN
A full store is a buffer, not proof of balance. If consumption keeps beating production, it will eventually empty. Fix the flow before adding more demand.
Compare your stocks at similar points over several cycles. Are meals and water recovering after use, or stepping lower each time? A single dip when residents eat is normal; a repeated decline needs attention.
Open Town overview from the town tools. Compare meal need and drinking demand with workplace rate now. Potential is conditional: missing inputs, staffing, weather or shifts can prevent that output.
As a planning rule, aim for enough meals and water to cover several consumption cycles, then build a bigger buffer before dry weather or growth. There is no single guaranteed safe stock number: population, weather and production vary.
More kitchens do not help if ingredients are empty. More farms do not help if kitchens are closed. Check ingredient spoilage too: producing far more than you can cook may waste food rather than protect the town.
04 / WHEN THE NUMBERS GO THE WRONG WAY
Check meals, ingredients and free workers. Do not add homes or spend your remaining materials on optional upgrades while the essentials are failing.
If ingredients are available but meals keep falling, inspect the kitchen: crew, shift and status. If ingredients are empty, inspect the farm or berry patch instead. A parched farm needs its moisture problem addressed, not just another kitchen.
Reduce crew at a nonessential workplace, then assign them to the food producer or kitchen that is limiting output. Resume and watch the actual production and next mealtime.
Wait until everyone is fed and the meal reserve is rebuilding over several cycles. Then consider extra capacity. A single successful batch does not mean the shortage is permanently solved.
Check drinking demand, collection conditions and farm irrigation. A cistern helps only if there is water to fill it. Inspect the weather outlook, preserve materials for water infrastructure, and let reserves recover before welcoming more residents. A wellhouse also has weather-dependent operation; check its current status and upgrade description rather than assuming it works in every phase.
05 / GROW WITH THE WEATHER
Use the weather outlook to prepare for dry spells. Farms lose moisture, rain collectors depend on rain, and mist has its own opportunities. Store surplus water during productive periods. Forecast projections describe the current snapshot, not a guarantee after you change the town.
Homes add beds. New residents bring helping hands and food and water needs as they arrive. Expand gradually once the current population has reliable supplies.
Crystal gardens need a glowing crystal deposit. Upgrades, new food routes and services are useful later, but first keep the basic food chain and water supply working. Town defense is optional; you do not need to enable it while learning the economy.
06 / MOUSE & KEYBOARD
| Action | Control |
|---|---|
| Move the camera | WASD, arrow keys, or right-button drag |
| Zoom | Mouse wheel or trackpad scroll |
| Select or place | Left click |
| Finish a tool | Esc or a short right click |
| Find a building | B |
| Centre town / selection | Home / F (Fn + Left Arrow for Home on some Macs) |
| Pause / resume | Space |
| Save | Cmd+S on Mac; Ctrl+S on Windows/Linux |
Mouse placement confirms on click. The touch preview-and-Place flow is different. Open the in-game Controls reference for the full list.
07 / BEFORE YOU GO
Use the game's Save option before a big experiment or leaving your town. On iPhone, expand the crystal dock to reach Menu. If something is confusing or breaks, open Playtest notes from the management tools and describe what you did, what you expected and what happened. Screenshots and your build number are especially useful.
Send feedback submits the note to the developer; Save note locally keeps it on your device. Saved notes are not sent automatically.
The experimental co-op prototype uses a trusted local network with one host and matching builds. It is not internet matchmaking. Each player's device and build may differ, so check availability before planning a session.
Hearthlings is an early playtest. Controls, layout and balance change between builds. This guide's phone screenshots are real game renders from scripted test scenes based on 0.47.0, not photographs from an iPhone, and include test resources. Use your in-game status messages and build number when reporting a mismatch.
You do not need a perfect town. Start small, follow the bottleneck, and leave yourself room to recover.
Back to the top ↑